Recurring damp patches, peeling paint, and balcony or terrace leaks are not solved by choosing a new colour or adding an interior finish. You will be able to identify the likely water-entry path, decide whether exterior work must come first, and sequence repairs so new surfaces, electrical work, and kitchen installations do not conceal continuing damage.
Key takeaways
- Choose exterior work for one leak with sound interior structure.
- Choose a full house remodel when dampness spans rooms or services.
- Inspect roof joints, parapets, openings, walls, and drainage before repairs.
- Dry the building fully before starting interior renovation.
Decide Whether the Problem Needs a House Remodel or Exterior Work First
A focused exterior home remodel is enough when water enters through one identifiable route, such as a roof joint, parapet, window perimeter, balcony edge, or blocked discharge path, and the interior structure remains sound. Choose a full house remodel when dampness affects several rooms, electrical or plumbing routes, structural elements, or the building layout itself.
| Option | What to check | Decision |
|---|---|---|
| Exterior home remodel | One or two confirmed entry paths, sound walls, dry electrical systems, and no major structural movement | Repair drainage, roof surfaces, openings, cracks, and external finishes |
| Full house remodel | Repeated seepage across rooms, damaged plaster and flooring, concealed service faults, or unsafe structural additions | Coordinate exterior repairs with electrical, plumbing, structural, and interior work |
| Structural assessment first | Added tiles, screeds, planters, tanks, masonry, or stone will increase slab or balcony load | Stop design approval until a qualified professional checks capacity |
Start with diagnosis, not repainting. A new coating over a damp wall traps the problem and leads to blistering, peeling, or salt deposits; cabinets installed against that wall can suffer swelling and concealed mould.
Trace water from the roof drainage path to its discharge point, then check whether the wall, opening, plumbing line, or ground drainage is actually responsible.
Complete exterior and drainage repairs before interior plaster, paint, flooring, electrical work, or modular-kitchen installation. If the building dries after those repairs, a targeted project is safer and cheaper; if moisture returns from multiple sources, treat it as a house remodel rather than a cosmetic renovation.
Inspect Every Roof, Wall, Opening, and Drainage Point
Before approving exterior home renovation work, inspect the complete water path from roof to discharge point, not just the wall showing stains. A new coating cannot stop water entering through a failed joint, blocked outlet, or raised ground level.
1. Check roof slabs, terrace joints, parapets, valleys, chajjas, and every pipe or cable penetration. Confirm the roof falls toward working outlets, gutters, and downpipes; trace each downpipe to a safe discharge point with a clear overflow route.
2. Examine exterior plaster for cracks, hollow patches, peeling paint, blistering, and white salt deposits. Classify cracks as hairline shrinkage, moving structural cracks, corrosion-related cracks, or junction cracks before anyone fills them.
3. Test window and door surrounds. The sill must slope outward, the frame-to-wall perimeter must be sealed, and the external sealant must suit both materials. Inspect balconies for ponding, blocked drains, damaged edges, and seepage below.
4. Check plumbing outlets, bathroom and kitchen chases, and adjoining walls for active leakage. Compare the stain’s timing and location with rainfall, plumbing use, condensation, and leakage from a neighbouring property.
5. Inspect plinths and ground drainage. Keep soil, paving, plaster, and render below the damp-proof course, and direct surface water away from the wall.
Approve the work only after the cause is recorded with photographs and moisture readings. Repainting a damp surface hides the failure briefly, then returns as peeling, blistering, or salt deposits.
Use the Right Repair Sequence Before the Rain Intensifies
Repair drainage and roof defects before any cosmetic house renovation, then close wall and opening leaks; postpone interiors until the building is dry.
- Clear gutters, downpipes, terrace outlets, balcony drains, and ground-level channels. Repair ponding, loose flashing, parapet junctions, and roof cracks before the next sustained rain.
- Repair classified wall cracks, damaged plaster, window surrounds, chajjas, and plumbing penetrations. Do not cover moving, corrosion-related, or junction cracks with paint alone.
- After the exterior is watertight, test plumbing, earthing, circuit protection, and wet-area outlets. Install cabinets, flooring, interior plaster, and paint last.
| Work | Do before rain intensifies | Wait or avoid in heavy rain |
|---|---|---|
| Drainage and roof repairs | Unblock outlets; replace damaged flashing; correct slopes | Do not climb wet roofs or work near lightning |
| Wall and opening repairs | Seal dry joints; replace failed plaster; repair sills | Do not apply coatings, sealants, or plaster to rain-wet surfaces |
| Interior finishes | Plan materials and electrical routes | Delay paint, flooring, gypsum, and modular-kitchen installation until moisture readings are stable |
Exterior coatings fail when the surface is saturated, and trapped moisture later blisters paint or weakens plaster. A house renovation that adds tiles, screed, planters, tanks, masonry, or stone also needs a structural-capacity check before installation. Keep paving and soil below the damp-proof course so water cannot bridge it and rise through the wall.
Match the Repair Material to the Surface and Water Exposure
Compare the repair material with the surface, movement, and water pressure before approving a house exterior renovation. A wall coating cannot stop water entering through a failed joint, and a flexible sealant cannot repair loose plaster or a structural crack.
| Material | Best location | Compare before selecting |
|---|---|---|
| Coating | Sound exterior plaster and masonry | Check vapour permeability, UV resistance, substrate moisture, and whether it bridges only hairline cracks |
| Membrane | Roof slabs, terraces, balconies, and parapets | Check ponding tolerance, reinforcement at corners and outlets, adhesion, and protection from traffic or sharp finishes |
| Sealant | Window perimeters, pipe penetrations, and movement joints | Match the sealant to masonry, aluminium, uPVC, or concrete; confirm movement capacity and resistance to sun and rain |
| Flashing | Roof-wall junctions, parapets, chajjas, and window sills | Choose corrosion-resistant metal or a compatible formed membrane that discharges water outward, not into the wall |
| Plaster repair | Hollow, detached, or eroded external plaster | Remove unsound material, control curing, and match the existing substrate; paint alone will conceal, not repair, failure |
| Crack treatment | Cracks in plaster, concrete, or material junctions | Classify shrinkage, moving structural, corrosion-related, and junction cracks before filling; use flexible treatment for movement |
During an exterior home renovation, keep paving, soil, and render below the damp-proof course. Direct downpipes away from walls, and seal a replacement window’s frame perimeter only after confirming the sill falls outward. Never cover a wet wall or trap moisture behind a dense coating.
Coordinate Interior Renovation Only After the Building Is Dry
Do not close walls or order fixed cabinetry until the repaired building has dried and moisture readings have stabilised. A damp surface covered with plaster, paint, flooring, or panels traps water and produces peeling, mould, swollen boards, and concealed corrosion.
Plan the house renovation in this order:
- Complete roof, drainage, wall, window, and balcony repairs, then check the building during or after rainfall.
- Finish plumbing pressure tests and leak checks before covering chases or floors.
- Install electrical conduits, boxes, earthing, circuit protection, and residual-current protection before plastering.
- Apply interior plaster and paint only when walls and slabs are dry enough for the specified materials.
- Install flooring, doors, wardrobes, and modular kitchen cabinets last.
Keep wet-area sockets away from splash zones and floor-level water. Use a licensed electrician to verify earthing, correctly rated breakers, and an RCCB or RCBO; never treat an extension board as a permanent outlet.
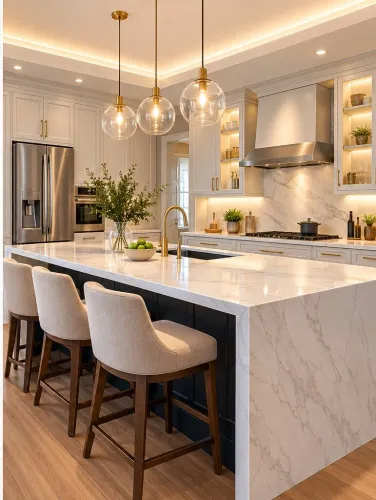
In a kitchen remodel, leave the sink trap, water supply joints, dishwasher connection, and waste pipe accessible through removable panels. Keshar Modular Kitchen can coordinate cabinet dimensions with the plumber and electrician after those service points are fixed, preventing a cabinet from blocking a valve or electrical connection.
Bring in a structural engineer before adding tanks, planters, masonry, screeds, tiles, or stone. Use a waterproofing specialist for recurring seepage, failed junctions, or cracks that reopen after filling. This coordination prevents a cosmetic house remodel from hiding a structural or plumbing fault.
Frequently asked questions
When is an exterior home remodel enough for monsoon protection?
Choose focused exterior work when water enters through one identifiable route and the interior structure remains sound. Typical routes include a roof joint, parapet, window perimeter, balcony edge, or blocked discharge path.
When does a house remodel make more sense than exterior repairs?
Choose a full house remodel when dampness affects several rooms, electrical or plumbing routes, structural elements, or the building layout.
What should you inspect before monsoon repair work?
Inspect every roof joint, parapet, wall, window and door opening, balcony edge, pipe penetration, gutter, downpipe, terrace outlet, and ground-level drainage point.
When should interior renovation begin after water damage?
Start interior renovation only after the leak source is repaired, drainage works, surfaces dry fully, and electrical and structural conditions have been checked.